Sign git commits using your yubikey in less than 5 minutes
It has been a while since my last blog post. (a lot has happened since, it would take a series of articles to tell you everything I learned in the last year, I will try to be more regular)
Today we will see how we can easily set up a new GPG key using your Yubikey to sign your git commits in less than 5mn.
Check your yubikey configuration
First, you need to check that your Yubikey is connected to your computer. Then run the following command to check your configuration:
gpg --card-status
if you see something like this:
gpg: error getting version from 'scdaemon': No SmartCard daemon
gpg: la carte OpenPGP n'est pas disponible : No SmartCard daemon
then you need to install some missing binaries
sudo apt-get install gnupg2 pcscd pcsc-tools scdaemon
If you retry the status command and you see something like this, you can now continue the git configuration.
Reader ...........: Yubico YubiKey OTP FIDO CCID 00 00
Application ID ...:
Application type .: OpenPGP
Version ..........: 3.4
Manufacturer .....: Yubico
Serial number ....: 154xxxxxx
Name of cardholder: [non positionné]
Language prefs ...: [non positionné]
Salutation .......:
URL of public key : [non positionné]
Login data .......: [non positionné]
Signature PIN ....: non forcé
Key attributes ...: rsa2048 rsa2048 rsa2048
Max. PIN lengths .: 127 127 127
PIN retry counter : 3 0 3
GPG/GIT configuration
Let’s start by creating a new GPG key using your yubikey.
Run the following command to start the key generation process:
gpg --card-edit
If everything is Ok, you should see something like this:
Reader ...........: 1050:0407:X:0
Application ID ...:
Application type .: OpenPGP
Version ..........: 3.4
Manufacturer .....: Yubico
Serial number ....: 154xxxxxx
Name of cardholder: [non positionné]
Language prefs ...: [non positionné]
Salutation .......:
URL of public key : [non positionné]
Login data .......: [non positionné]
Signature PIN ....: non forcé
Key attributes ...: rsa2048 rsa2048 rsa2048
Max. PIN lengths .: 127 127 127
PIN retry counter : 3 0 3
Signature counter : 0
KDF setting ......: off
Signature key ....: [none]
Encryption key....: [none]
Authentication key: [none]
General key info..: [none]
Now you need to enable admin mode by running the following command:
gpg/carte> admin
Les commandes d'administration sont permises
To start the GPG key generation process, you need to run the following command:
gpg/carte> generate
You need to follow the instructions by specifying the expiration date, your real name, and the email address.
Once you’ve done that, you can verify that your gpg key is correctly configured by running the following command:
gpg --list-keys --keyid-format LONG
Now If you want to enable signing your commits, you can it globally by running the following command:
git config --global user.signingkey $(gpg --list-keys --keyid-format LONG| grep pub | grep -o -P '(?<=/)[A-Z0-9]{16}')
git config --global commit.gpgsign true
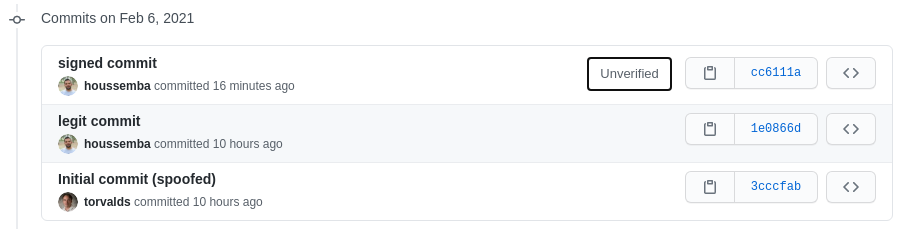
your commit is now signed, but it’s not verified by Github/Gitlab.
To finish the setup, you need to export your public key for the next step
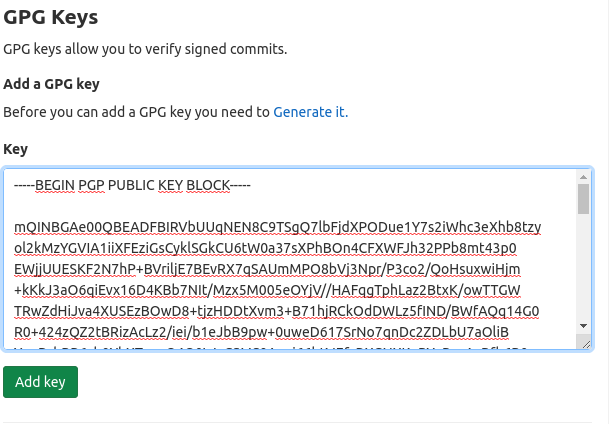
gpg --armor --export EMAIL_ADDRESS
Verify commit - Gitlab
Once you exported your public key, you need to put it on Gitlab.
On the GPG Keys settings page (on Gitlab for example), paste your public key and validate.